Friday, January 19, 2018

Vintage Inspired Valentines Entryway

It's the first holiday after Christmas and I couldn't wait to get some new décor up in the house! Valentines décor can be tricky sometimes. The stores sell mostly red and pink cutesy stuff and that's just not my style. I love seeing it in others homes though! For myself, I wanted something with a vintage and romantic feeling. Simple, with touches of blush. I don't decorate the whole house.....just one little area on our buffet table.

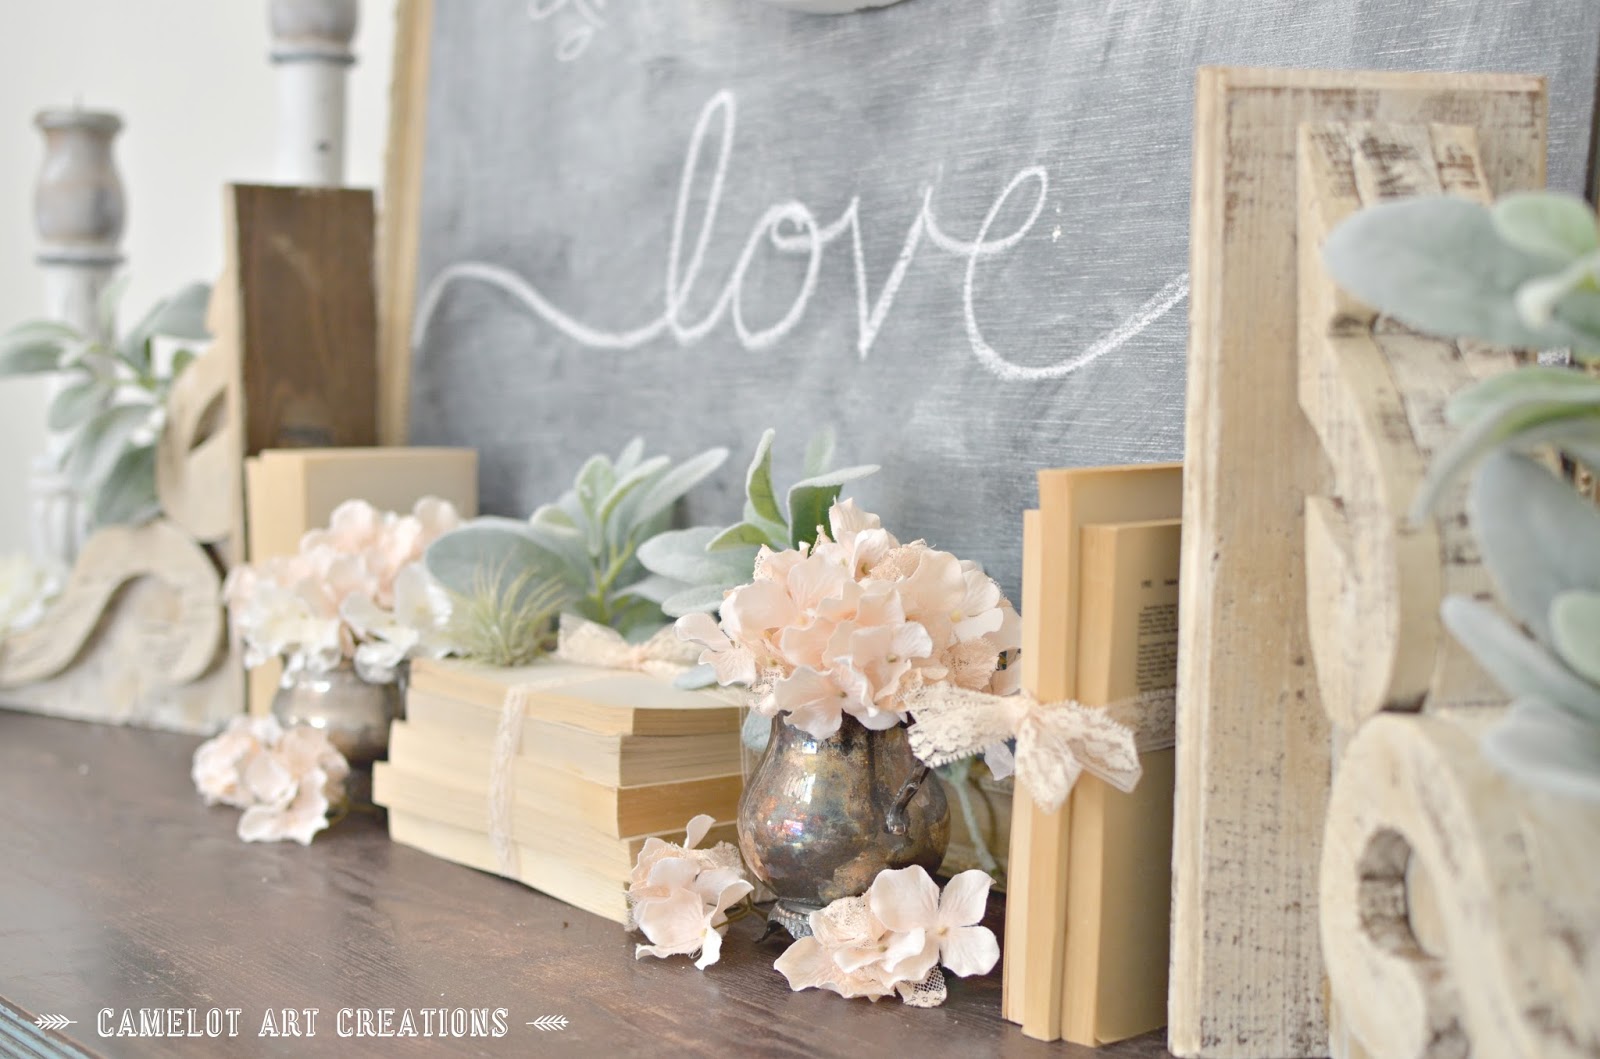
Using old books, antique corbels and antique china filled with flowers adds a simple vintage feel. You don't need to always write on a chalkboard either. They make for a different background to layer décor over. I used a command hook to hang the wreath in the center of the empty frame and the frame is just duck tapped to the back of the chalkboard.


The heart ornaments are from Target after Christmas sale 4 years ago! I knew when I saw them I wasn't going to use them for Christmas, but for Valentine's décor.


I ripped the covers off of old books and bundled them together with blush lace. Aren't they cute? I have a thing for lace! I would probably have it hanging off of everything in our house if I didn't have three boys!    haha


Every time I walk by this display, it makes me smile! How about you, are you ready to decorate for Valentines now?


Linking To:


Sunday, January 14, 2018

China Cabinet Makeover

A good makeover never gets old! We recently inherited my husbands Grandmother's china cabinet and dining room table with chairs. I haven't decided what color to refinish the table set in yet but I knew exactly how I wanted to redo the china cabinet! The before is really heavy and dark looking. If you haven't used Fusion Mineral Paint, you should! It has become my go to paint! Easy to use, great color selection, no priming necessary and it has a top coat built into the paint, so you don't have to seal it! One less step is always a good thing. I do recommend on higher traffic pieces you might want to add wax or a poly. 

I was planning on priming the hutch first since the wood is so dark and I was afraid of the wood bleeding through but I took a chance and painted a section to see if it was going to bleed through the paint. Nope! I wanted a chippy look to it and since the finish on the hutch was shinny/slick when I started sanding it the paint came off in larger sections & I LOVE it!


This is the before. Dark and heavy looking but has good bones!


I used Fusion Mineral Paint in Champlain for the body and Rust-Oleum in Serenity Blue for the back wall.


It took 3 coats to cover completely and I started sanding it a couple hours after the paint dried so it would be easier to sand in a chippy look. I used a coarse grade, 120 grit sanding disk since already have a lot of them for my sander. Using pressure with one finger in the areas I wanted to chip away. After you have your desired look, go over it with a fine (220 grit) sanding block to get a smooth finish. 


Zibra Paint Brush's makes a round spindle brush that was perfect for the little window panes. It hugs all of the edges and covers in two stokes!


To keep with the rustic feel of this makeover I decided to do a very soft dry brush over the blue with the same color of the body of the china cabinet. You can see the difference in the top photo. The upper shelf area doesn't have the dry brush or distressing.


I painted over the hinges and distressed them. It gives a soft look with the hardware just blending in with the piece. 


I couldn't be any happier with this makeover! I'm on the hunt for an affordable chandelier and rug now! I'm thinking I want to go with a natural wood toned chandelier. Onto the next makeover!


Linking To:


Sunday, January 7, 2018

DIY Topiary

Firs blog post of 2018! With Christmas over and Spring on its way I'm bringing more greenery into our home. These faux topiaries are great to use year round though! I can't take credit for this amazing idea, Natalie at The Vintage Porch made these faux topiaries with Christmas evergreens and when the stems went on sale at Hobby Lobby I purchased all that they had left for a $1 each!

It took about 2 1/2-3 stems to make the top part of the topiary. I just cut a branch off of our hedge in the backyard for the stem and I had white foam balls from the Dollar Tree, they sell 2 in a package for a $1!  


You can buy green foam balls but since I already had white I just painted it green with some chalk paint. I pocked a chopstick into the ball to hold it and paint. Let it dry and pull the chopstick out.


You will pull all of the little leaf branches off of the whole stem. 


Some are shorter than the others and I used the shorter ones for the under/bottom side of the ball. You can see in the picture below how the leaves are shorter around the bottom.


Once I had most of the stems pushed into the foam ball, I pushed the branch into the ball and finished filling the spaces in with the evergreen leaves. 


I shoved the base of the branch into foam bricks that I had from one of those Edible Arrangement fruit baskets! Free! I covered the bright green up with some scrap pieces of burlap and tied jute twine around the base of the branch to gather all of the burlap to the branch and placed into an olive bucket from Hobby Lobby. 


This project was so easy and cost maybe $8-$10!! If you have ever been topiary shopping they are WAY more than $10! 


Follow Me On Instagram

amazon

Related Posts Plugin for WordPress, Blogger...